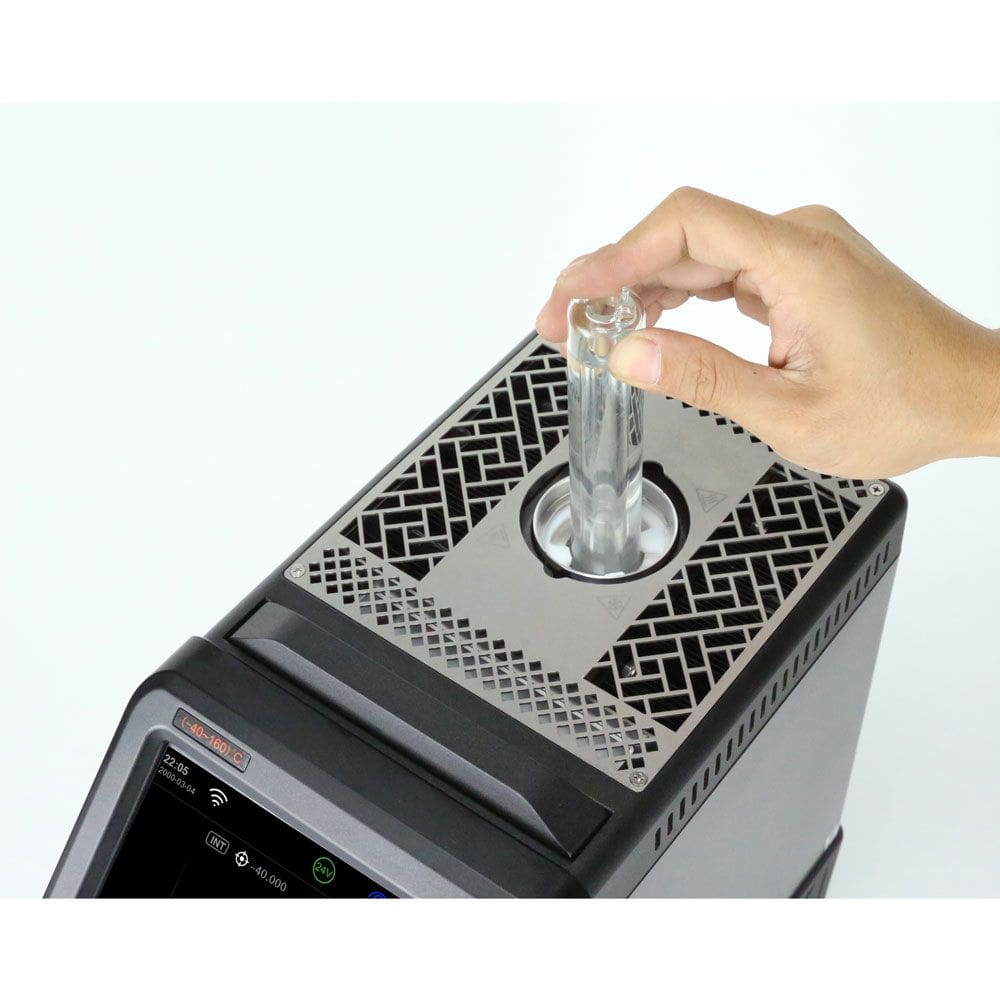
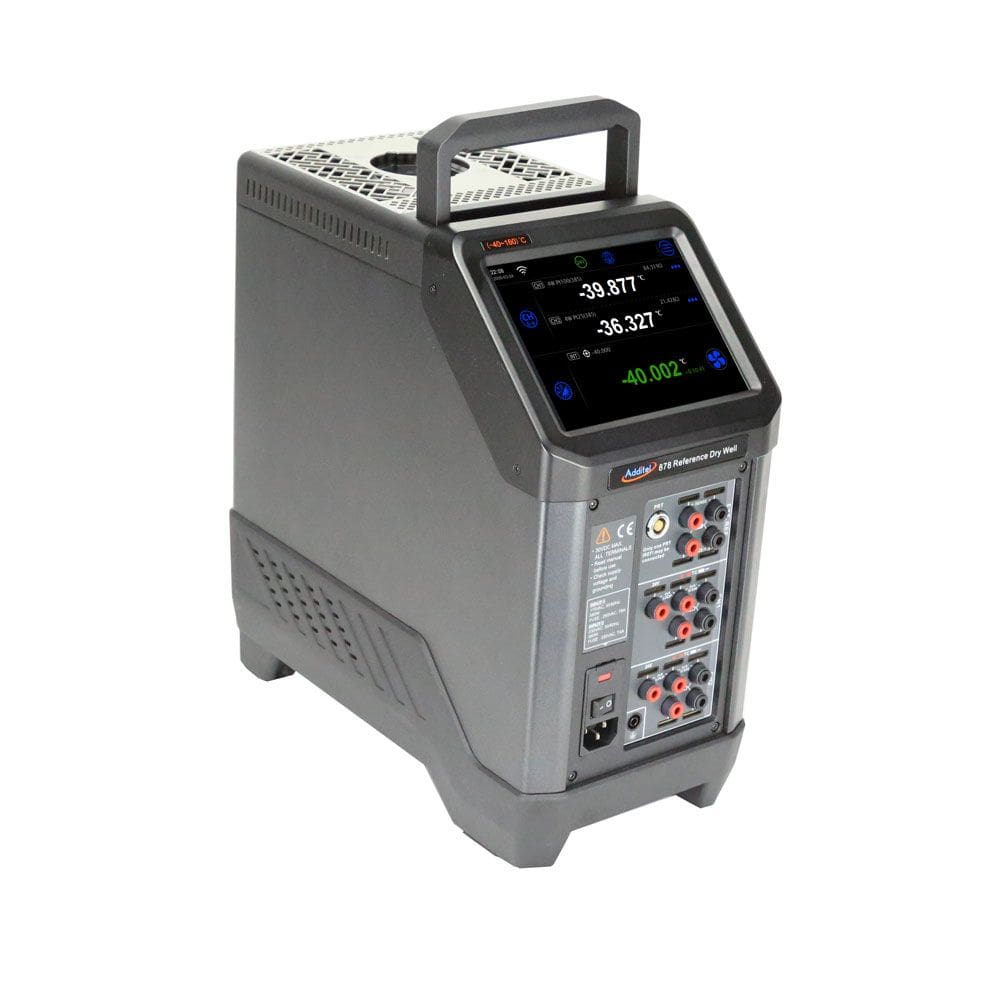
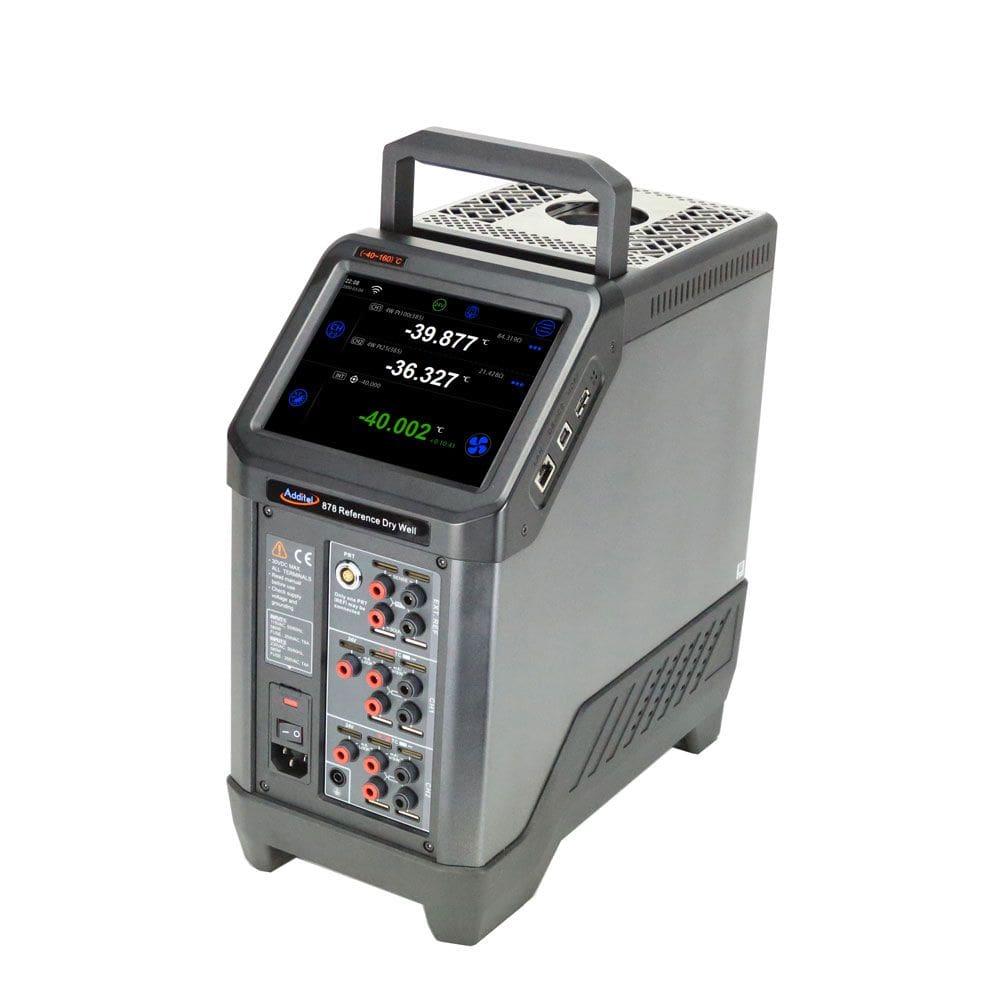
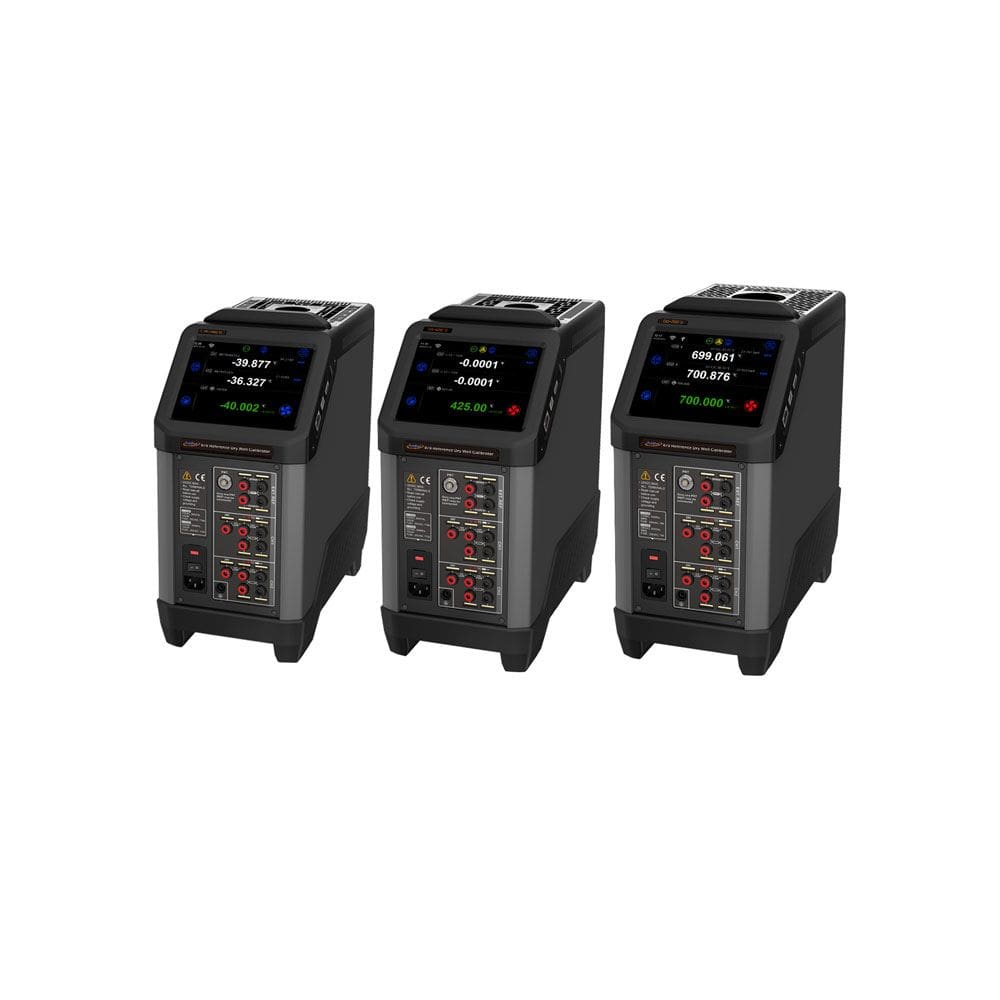
Additel ADT878-425-B-110V Reference Dry Well Calibrator
$11,925.00
Reference Dry Well Calibrator, 33°C to 425°C, Insert B, 110V
- Temperature control from 33℃ to 425℃
- Reference level performance in accuracy, stability and uniformity
- Quick to temperature
- Two-channel readout measures RTDs and TCs, and provides task documentation
- Full HART communicator (PC Option)
- Wi-Fi and Bluetooth capable
- Color touch screen display
- Quick-Push connectors (PC Option)
- Set point control by reference
- Self-calibration feature
- Optional TPW kit for built in automatic realization (ADT878-160 only)
- Built in automatic annealing feature (ADT878-700 only)
Description
We are taking temperature calibration to the next level with the Additel 878 Reference Dry Well Calibrators. If you are looking for the best dry well on the market, then look no further! Additel’s commitment to continuous improvement, quality and time saving features are on full display in the ADT878 series. With three models to choose from, ranging from -40 to 700°C, you will find the perfect fit for your calibration needs. The Process Calibrator option adds an external reference input, a two-channel readout for UUT’s and a full complement of capabilities to help with everything from measuring temperature sensors, to calibrating thermocouples, self-calibrating the Reference Well and configuring HART transmitters. Each unit comes standard with a large touchscreen display, dual-zone control and Additel’s commitment to the best customer service in the industry. We are certain that you will be blown away by the outstanding performance of these game-changing Reference Dry Wells!
Process Calibrator Option
Each model can be purchased with our Process Calibrator (PC) option. This option combines the many features found in a fully functional HART documenting process calibrator with the reference grade dry well. This option includes the ability to measure a reference PRT, with virtually any connection type, and two device under test channels which can measure, mA, voltage, switch, RTD or thermocouple. In addition to these measurement functions, this calibrator has full documenting capability of creating tasks, saving as found and as left results, as well as communication with HARTsmart transmitters. The process calibrator option also has an on board full HART communicator which allows users to read, configure and calibrate HART transmitters. The snap shot feature allows you to capture all information displayed on the screen with the push of a button. This optional add-on allows for data logging of all channels on an auto step function. Using a reference PRT, you can also control to the dry well set point using either the internal sensor or an external reference PRT.
Self Calibration
We believe using an external reference probe as your standard is the best way to perform your temperature calibration. But we also recognize this method is not always necessary or convenient and depending on the application, using the internal control sensor would be preferred. Traditionally, the internal control sensor has a wide accuracy which can largely be contributed to its long-term drift. We’ve built in a self-calibration feature allowing you to run an automated calibration of the internal control sensor using your external reference. With literally a few selections the calibration will run automatically giving you a fresh, traceable calibration of the control sensor which will improve its accuracy as you will not have to account for its long term drift when used as the reference.
Automation Features
Traditionally, dry wells were simply a stable heat source. To enhance the usability of our Reference Dry Wells, we’ve added automation features enabling you to utilize these amazing devices as a highly stable heat source, triple point of water maintenance apparatus, and annealing furnace. Combined with the ADT878-TPW-KIT, the ADT878-160 Reference Dry Well can be used to automatically realize and maintain a triple point of water cell. Traditional methods take time and practice to realize the triple point of water. Additel has now simplified this process with an automatic TPW realization feature. Simply insert the cell and PRT into the Reference Dry Well and run the procedure. The automation in the firmware will alert when the cell is super cooled. Remove the cell and give it a shake and now you can maintain the triple point in the reference well. This is very useful to check the drift of your PRT. For more information, please see our ADT878-TPW-KIT data sheet. When you purchase our 700°C Reference Dry Well, you will find our automatic annealing feature used to anneal PRTs. We have preconfigured annealing procedures that set the temperature annealing time and cool down rate. This feature, also lets you create your own annealing procedures.
Additional information
| Weight | 24.7 lbs |
|---|---|
| Dimensions | 13.0 × 13.58 × 6.69 in |
Specifications
| Reference Dry Well Specifications | |||
|---|---|---|---|
| Specification | 878-160 | 878-425 | 878-700 |
| Temperature Range at 23°C | -40°C to 160°C | 33°C to 425°C | 33°C to 700°C |
| Display Accuracy | ±0.1°C at Full Range | ±0.2°C at Full Range | ±0.20°C at 33°C |
| ±0.20°C at 425°C | |||
| ±0.25°C at 660°C | |||
| Stability (30 min) | ±0.005°C at Full Range | ±0.005°C at 100°C | ±0.005°C at 100°C |
| ±0.010°C at 225°C | ±0.015°C at 425°C | ||
| ±0.015°C at 425°C | ±0.030°C at 700°C | ||
| Axial Uniformity at 60 mm (2.4 in) | ±0.025°C at -40°C | ±0.10°C at 100°C | ±0.10°C at 100°C |
| ±0.020°C at 0°C | ±0.15°C at 225°C | ±0.25°C at 425°C | |
| ±0.050°C at 160°C | ±0.25°C at 425°C | ±0.40°C at 700°C | |
| Axial Uniformity at 80 mm (3.15 in) | ±0.050°C at -40°C | ±0.15°C at 100°C | ±0.15°C at 100°C |
| ±0.040°C at 0°C | ±0.20°C at 225°C | ±0.30°C at 425°C | |
| ±0.050°C at 160°C | ±0.30°C at 425°C | ±0.60°C at 700°C | |
| Radial Uniformity | ±0.01°C at Full Range | ±0.025°C at 100°C | ±0.025°C at 100°C |
| ±0.030°C at 225°C | ±0.040°C at 425°C | ||
| ±0.040°C at 425°C | ±0.060°C at 700°C | ||
| Loading Effect | ±0.08°C (Display Sensor) | ±0.05°C (Display Sensor) | ±0.02°C at 100°C |
| ±0.05°C at 425°C | |||
| ±0.15°C at 700°C | |||
| ±0.010°C (External Sensor) | ±0.01°C (External Sensor) | ±0.01°C at 100°C | |
| ±0.02°C at 425°C | |||
| ±0.03°C at 700°C | |||
| Hysteresis (Display Sensor) | 0.025°C | 0.04°C | 0.07°C |
| Environmental Conditions | 8°C to 38°C guaranteed accuracy | ||
| 0°C to 50°C, 0% to 90% RH non-condensing | |||
| Storage Conditions | -20°C to 60°C | ||
| IP Rating | IP20 | ||
| Immersion Depth | 160 mm (6.30 in) | 193 mm (7.60 in) | |
| Insert OD | 31.9 mm (1.26 in) | 30.8 mm (1.21 in) | |
| Heating Time | 4 min: -40°C to 23°C | 15 min: 23°C to 425°C | 25 min: 23°C to 700°C |
| 10 min: 23°C to 160°C | |||
| Cooling Time | 8 min: 160°C to 23°C | 24 min: 425°C to 100°C | 30 min: 700°C to 100°C |
| 15 min: 23°C to -40°C | 15 min: 100°C to 50°C | 15 min: 100°C to 50°C | |
| Typical Time to Stability | 10 min | ||
| Resolution | 0.001°C | ||
| Units | °C, °F, and K | ||
| Display | 6.5 in (165 mm) color touch screen | ||
| Size (H x W x D) | 170 x 345 x 330 mm (6.69 x 13.58 x 13.0 in) | ||
| Weight | 11.2 kg (24.7 lbs) | 9.7 kg (21.4 lbs) | |
| Power Requirements | 90-254 VAC, 45-65 Hz, 580 W | 90-25 VAC, 45-65 Hz, 1400 W | |
| Communication | USB A, USB B, RJ45, WiFi, Bluetooth | ||
| Localization | English, Chinese, Japanese, Russian, German, French, Italian, and Spanish | ||
| Warranty | 1 year | ||
| Input Specifications (Process Calibrator [PC] Option) | |
|---|---|
| Specification | Description |
| Readout Accuracy for 100 ohm PRT (Probe Accuracy Not Included) | ±0.005°C at -40°C |
| ±0.006°C at 0°C | |
| ±0.008°C at 50°C | |
| ±0.009°C at 100°C | |
| ±0.011°C at 160°C | |
| ±0.015°C at 300°C | |
| ±0.019°C at 425°C | |
| ±0.026°C at 660°C | |
| ±0.028°C at 700°C | |
| Readout Resolution | 0.1 mΩ |
| Reference Resistance Temperature Measurement Range | -200°C to 926°C |
| Reference Resistance Accuracy | 0Ω to 50Ω: ±1.25mΩ |
| 50Ω to 400Ω: ±0.0025% RD | |
| Reference Characterizations | ITS-90, CVD, IEC-751 |
| Reference Measurement Capability | 4-wire PRT |
| Reference Probe Connection | 6-pin lemo smart connector and Quick-Push connectors to accept banana, mini-banana, large & small spade lug and bare wire connections |
| RTD Channels | 2 channels. Both accept 2, 3, or 4-wire RTDs |
| RTD Measurement Accuracy (excl sensor) | 0Ω – 25Ω: ±0.002Ω |
| 25Ω – 400Ω: 0.004% RD | |
| 400Ω – 4kΩ: 0.005% RD | |
| RTD Measurement Resolution | 0.1mΩ |
| RTD Measurement Resistance Range | 0Ω to 4KΩ |
| RTD Characterizations | PT10, PT25, PT50, PT100, PT200, PT500, PT1000, CU10, CU50, CU100, NI100, NI120 |
| RTD Connection | Quick-Push connectors accept banana, mini-banana, large & small spade lug and bare wire connections. |
| TC Channel | 2 |
| TC Measurement Channels | Accepting S, R, K, B, N, E, J, T, C, D, G, L, and U |
| TC Range | -75 mV to 75 mV |
| TC Resolution | 0.1µV |
| TC Voltage Accuracy | 0.01% RD + 5 µV |
| Internal CJC Accuracy | ±0.2°C (ambient from 0°C to 50°C) |
| Current Range | -30 mA to 30 mA |
| Current Accuracy | 0.01% RD + 2 µA |
| Current Resolution | 0.1 µA, Input Impedance: < 10Ω |
| Voltage Range | -12 V to 12 V and –30 V to 30 V |
| Voltage Accuracy | ±0.01% RD + 0.6 mV |
| Voltage Resolution | 0.1 mV; Input impedance: >1MΩ |
| Switch Test | Mechanical or Electrical |
| DC 24V Output | 24 V ±0.5 V, MAX 60 mA |
| Hart Communicator | Read, configure and calibrate HART devices – DD files updated periodically. Optional – (order ADT875PC) |
| Documentation | Up to 1,000 tasks which store up to 10 results each containing as found and as left data. Snap shot feature allows for screen captures. Records auto step and ramp functions. |
| Temperature Coefficient (0°C to 13°C and 33°C to 50°C) | ADT878 (PC)-160: ±0.005°C/°C |
| ADT878 (PC)-425/700: ±0.005°C/°C | |
| Ref Readout: ±1 ppm FS/°C | |
| RTD Readouts: ±1 ppm FS/°C | |
| TC Readouts: ±5 ppm FS/°C | |
| Current: ±5 ppm FS/°C | |
| Voltage: ±5 ppm FS/°C | |
| TC Measurement Specification and Calculation (Process Calibrator [PC] Option) | ||
|---|---|---|
| TC Type | Temperature (°C) | Error (°C)[1] |
| B | 250 | ±1.99 |
| 300 | ±1.65 | |
| 425 | ±1.18 | |
| 660 | ±0.81 | |
| 700 | ±0.77 | |
| 1768 | ±0.56 | |
| K | -200 | ±0.29 |
| -40 | ±0.13 | |
| 0 | ±0.13 | |
| 160 | ±0.14 | |
| 300 | ±0.15 | |
| 425 | ±0.16 | |
| 660 | ±0.18 | |
| 700 | ±0.19 | |
| 1000 | ±0.31 | |
| E | -200 | ±0.16 |
| -40 | ±0.09 | |
| 0 | ±0.09 | |
| 160 | ±0.08 | |
| 300 | ±0.09 | |
| 425 | ±0.10 | |
| 660 | ±0.12 | |
| 700 | ±0.13 | |
| 1000 | ±0.17 | |
| J | -210 | ±0.22 |
| -40 | ±0.10 | |
| 0 | ±0.10 | |
| 160 | ±0.11 | |
| 300 | ±0.12 | |
| 425 | ±0.13 | |
| 660 | ±0.14 | |
| 700 | ±0.14 | |
| 1000 | ±0.21 | |
| T | -200 | ±0.28 |
| -40 | ±0.14 | |
| 0 | ±0.13 | |
| 160 | ±0.11 | |
| 300 | ±0.11 | |
| 400 | ±0.11 | |
| N | -200 | ±0.46 |
| -40 | ±0.20 | |
| 0 | ±0.19 | |
| 160 | ±0.17 | |
| 300 | ±0.17 | |
| 425 | ±0.17 | |
| 660 | ±0.19 | |
| 700 | ±0.19 | |
| 1000 | ±0.27 | |
| S | -50 | ±1.25 |
| -40 | ±1.17 | |
| 0 | ±0.93 | |
| 160 | ±0.63 | |
| 300 | ±0.57 | |
| 425 | ±0.55 | |
| 660 | ±0.54 | |
| 700 | ±0.53 | |
| 1768 | ±0.66 | |
| R | -50 | ±1.33 |
| -40 | ±1.23 | |
| 0 | ±0.95 | |
| 160 | ±0.61 | |
| 300 | ±0.54 | |
| 425 | ±0.51 | |
| 660 | ±0.48 | |
| 700 | ±0.48 | |
| 1768 | ±0.58 | |
| [1] Excluding cold junction compensation errors. | ||
| Secondary PRT Information | ||||
|---|---|---|---|---|
| Specification | AM1710 Series | AM1730 Series | AM1751 Series | AM1760 Series |
| Temperature Range [3] | -60°C to 160°C | -200°C to 420°C | -200°C to 670°C | -200°C to 670°C |
| Resistance at 0°C | Nominal 100Ω | |||
| Temperature Coefficient | 0.003925 Ω / Ω / °C | |||
| Calibrated Accuracy (k=2)[2][3] | ±0.025°C at -40°C | ±0.025°C at -40°C | ±0.025°C at -40°C | ±0.010°C at -196°C |
| ±0.015°C at 0.01°C | ±0.015°C at 0.01°C | ±0.015°C at 0.01°C | ±0.006°C at 0.01°C | |
| ±0.025°C at 160°C | ±0.035°C at 420°C | ±0.035°C at 420°C | ±0.015°C at 420°C | |
| ±0.05°C at 661°C | ±0.025°C at 661°C | |||
| Drift | ±0.01°C at TPW after 100 hours at 160°C | ±0.01°C at TPW after 100 hours at 420°C | ±0.01°C at TPW after 100 hours at 661°C | ±0.004°C at TPW after 100 hours at 661°C |
| Short Term Stability | ±0.007°C | ±0.002°C | ||
| Thermal Shock | ±0.005°C after (10) thermal cycles from minimum to maximum temperatures | ±0.002°C after (10) thermal cycles from minimum to maximum temperatures | ||
| Hysteresis | <=0.005°C | <=0.001°C | ||
| Self-heating | 50 mW/°C | 0.0015°C at 0.5mA | ||
| Response Time | 9 seconds for 63% response to step change in water moving at 3 feet per second | |||
| Measurement Current | 0.5 mA or 1 mA | |||
| Sensor Length | 32 mm | 42 mm | ||
| Sensor Location | 5 mm from tip | |||
| Insulation Resistance | >1000 MΩ at room temperature | |||
| Sheath Material | Stainless Steel | Inconeltm | ||
| Dimension | AM1710-12-ADT | AM1730-12-ADT | AM1751-12-ADT | AM1760-12-ADT |
| 0.25 in dia X 12 in (6.35 mm X 305 mm) | 0.25 in dia X 12 in (6.35 mm X 305 mm) | 0.25 in dia X 12 in (6.35 mm X 305 mm) | 0.25 in dia X 12 in (6.35 mm X 305 mm) | |
| AM1710-BEND-ADT | AM1730-BEND-ADT | AM1751-BEND-ADT | AM1760-BEND-ADT | |
| 0.25 in dia X 12 in (6.35 mm X 305 mm), 90° bend at 7.4 inch (190 mm) from probe end | 0.25 in dia X 12 in (6.35 mm X 305 mm), 90° bend at 9.6 inch (245 mm) from probe end | 0.25 in dia X 12 in (6.35 mm X 305 mm), 90° bend at 9.6 inch (245 mm) from probe end | 0.25 in dia X 12 in (6.35 mm X 305 mm), 90° bend at 9.6 inch (245 mm) from probe end | |
| External Leads | Teflon™–insulated copper wire, 4 leads, 0.8 meters | |||
| Handle Dimension | 15 mm (OD) x 65 mm (L) | |||
| Handle Temperature Range[1] | -50°C to 160°C | -50°C to 180°C | ||
| Calibration | NIST traceable calibration with data included. Accredited calibration available per request. | |||
| [1] Handle temperatures outside this range will cause damage to the probe. | ||||
| [2] Includes calibration and 100 hour drift. | ||||
| [3] Probe calibration ranges may differ from probe temperature ranges (see Calibrated Accuracy for calibration ranges). | ||||
| *PRT Information from www.accumac.com | ||||
| Specifications | |
|---|---|
| Specification | Display |
| Uncertainty | <0.0005°C [1] |
| Immersion depth/ID | 115 mm X 8 mm |
| External Dimensions | 160 mm X 25 mm |
| Cell material | Borosilicate Glass |
| Realization time | 20 mins |
| Estimated working time | 2 hours |
| Recommended thermal Fluid | Ethanol |
| Warranty | 1 year |
| Secondary PRT Information | ||||
|---|---|---|---|---|
| Specification | AM1710 Series | AM1730 Series | AM1751 Series | AM1760 Series |
| Temperature Range [3] | -60°C to 160°C | -200°C to 420°C | -200°C to 670°C | -200°C to 670°C |
| Resistance at 0°C | Nominal 100Ω | |||
| Temperature Coefficient | 0.003925 Ω / Ω / °C | |||
| Calibrated Accuracy (k=2)[2][3] | ±0.025°C at -40°C | ±0.025°C at -40°C | ±0.025°C at -40°C | ±0.010°C at -196°C |
| ±0.015°C at 0.01°C | ±0.015°C at 0.01°C | ±0.015°C at 0.01°C | ±0.006°C at 0.01°C | |
| ±0.025°C at 160°C | ±0.035°C at 420°C | ±0.035°C at 420°C | ±0.015°C at 420°C | |
| ±0.05°C at 661°C | ±0.025°C at 661°C | |||
| Drift | ±0.01°C at TPW after 100 hours at 160°C | ±0.01°C at TPW after 100 hours at 420°C | ±0.01°C at TPW after 100 hours at 661°C | ±0.004°C at TPW after 100 hours at 661°C |
| Short Term Stability | ±0.007°C | ±0.002°C | ||
| Thermal Shock | ±0.005°C after (10) thermal cycles from minimum to maximum temperatures | ±0.002°C after (10) thermal cycles from minimum to maximum temperatures | ||
| Hysteresis | <=0.005°C | <=0.001°C | ||
| Self-heating | 50 mW/°C | 0.0015°C at 0.5mA | ||
| Response Time | 9 seconds for 63% response to step change in water moving at 3 feet per second | |||
| Measurement Current | 0.5 mA or 1 mA | |||
| Sensor Length | 32 mm | 42 mm | ||
| Sensor Location | 5 mm from tip | |||
| Insulation Resistance | >1000 MΩ at room temperature | |||
| Sheath Material | Stainless Steel | Inconeltm | ||
| Dimension | AM1710-12-ADT | AM1730-12-ADT | AM1751-12-ADT | AM1760-12-ADT |
| 0.25 in dia X 12 in (6.35 mm X 305 mm) | 0.25 in dia X 12 in (6.35 mm X 305 mm) | 0.25 in dia X 12 in (6.35 mm X 305 mm) | 0.25 in dia X 12 in (6.35 mm X 305 mm) | |
| AM1710-BEND-ADT | AM1730-BEND-ADT | AM1751-BEND-ADT | AM1760-BEND-ADT | |
| 0.25 in dia X 12 in (6.35 mm X 305 mm), 90° bend at 7.4 inch (190 mm) from probe end | 0.25 in dia X 12 in (6.35 mm X 305 mm), 90° bend at 9.6 inch (245 mm) from probe end | 0.25 in dia X 12 in (6.35 mm X 305 mm), 90° bend at 9.6 inch (245 mm) from probe end | 0.25 in dia X 12 in (6.35 mm X 305 mm), 90° bend at 9.6 inch (245 mm) from probe end | |
| External Leads | Teflontm –insulated copper wire, 4 leads, 0.8 meters | |||
| Handle Dimension | 15 mm (OD) x 65 mm (L) | |||
| Handle Temperature Range[1] | -50°C to 160°C | -50°C to 180°C | ||
| Calibration | NIST traceable calibration with data included. Accredited calibration available per request. | |||
| [1] Handle temperatures outside this range will cause damage to the probe. | ||||
| [2] Includes calibration and 100 hour drift. | ||||
| [3] Probe calibration ranges may differ from probe temperature ranges (see Calibrated Accuracy for calibration ranges). | ||||
| *PRT Information from www.accumac.com | ||||
| AM1612-ADT Secondary PRT Specifications | |
|---|---|
| Temperature Range | -40°C to 160 °C |
| Resistance at 0 °C | Nominal 100 Ω |
| Temperature Coefficient | 0.00385Ω/Ω /°C |
| Accuracy | ±0.05°C at 0°C |
| Drift | ±0.04°C at 0°C after 100 hours at 160°C |
| Short Term Stability | ±0.02°C |
| Thermal Shock | ±0.02°C after 10 times thermal cycles from minimum to maximum temperatures |
| Hysteresis | <= 0.01°C |
| Self-heating | 75 mW/°C |
| Response Time | 4 seconds for 63% response to step change in water moving at 3 feet per second |
| Measurement Current | 1 mA |
| Internal Sensor Length | 0.49″ (15 mm) |
| Dimension | 0.118″ X 0.984″ (3mm X 25mm) |
| Insulation Resistance | >1000 MΩ at room temperature |
| Sheath Material | Stainless Steel 316 L |
| Dimension | 0.118 inch X 1.78 inch ( 3 mm X 45 mm ) |
| External Leads | Enameled copper wire protected by high temperature heat shrink tubing, 4 leads, 0.8 meters |
| Calibration | NIST traceable calibration with data provided |
Related products
Additel ADT850 Laboratory Thermocouple Calibration Furnace
$20,481.00 – $21,803.00
Additel ADT878PC-700-NO-110V Reference Dry Well Calibrator
$17,248.00
Additel ADT878PC-700-H-110V Reference Dry Well Calibrator
$18,150.00
Additel ADT878PC-700-G-110V Reference Dry Well Calibrator
$18,150.00
Our Newsletter Is Coming Soon!
Please check back soon while we get these important updates in place.


